Asian Coater is a trusted name in surface finishing and coating solutions, we provide high-quality Vinyl Film Pasting Services. Our company provide top-grade products that make even the most challenging coating jobs simpler and more efficient. One of the growing trends in the automotive world today is vehicle wrapping — an exciting, creative, and cost-effective way to transform the look of your car. For those who love a bit of hands-on creativity, DIY car wrap projects have become increasingly popular. Whether you want to give your car a new color, protect the paint, or simply add a personal touch, wrapping your car yourself is easier than ever with the right DIY car wrap kit and a few practical tips.
How to Wrap Your Car Yourself ?
Car wrapping involves covering the vehicle’s paint surface with a special vinyl material; this layer can be glossy, matte, metallic, or even textured to create unique finishes. Unlike repainting, it’s reversible, affordable, and can be done at home with the proper guidance and materials.
Here’s a step-by-step guide to successfully perform a DIY vinyl wrap:
- Step 1: Clean and Prepare the Surface: Start by thoroughly cleaning your car. Any dirt, dust, or grease left on the surface can cause bubbles or poor adhesion during vinyl film pasting. Use a high-quality automotive cleaner and degreaser, followed by wiping the surface dry with a microfiber cloth. A smooth, clean surface ensures the vinyl adheres perfectly and lasts longer.
- Step 2: Remove Parts for Easy Wrapping: Before applying the vinyl, it’s recommended to remove parts like mirrors, door handles, and badges if possible. This step makes vinyl film pasting smoother and ensures clean edges without visible seams. For first-time DIY enthusiasts, taking pictures while removing parts helps you reassemble them later with ease.
- Step 3: Measure and Cut the Vinyl: Next, measure each section of your car and cut pieces of vinyl slightly larger than the actual area. It’s better to have a bit of extra material than to fall short. Most DIY car wrap kits come with grid-lined backing paper to make cutting accurate. Remember to plan the wrapping order — starting with flatter surfaces like the hood or doors before moving to curved areas like bumpers or mirrors.
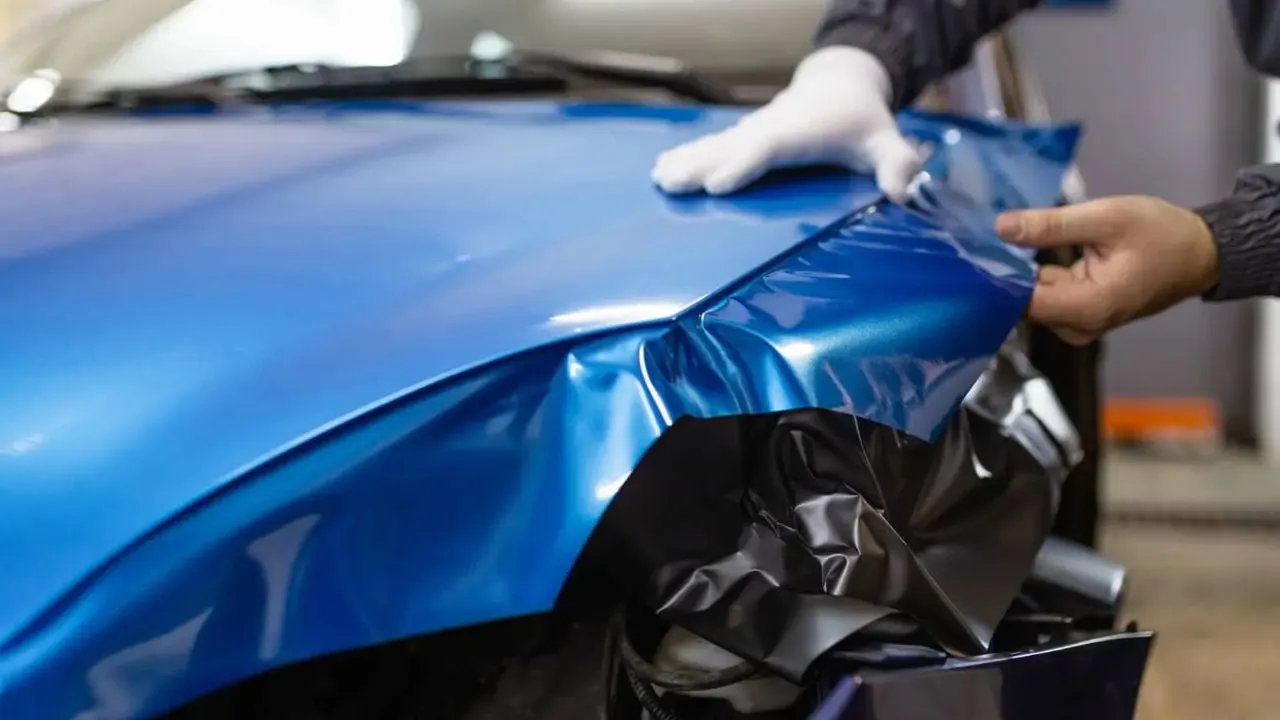
- Step 4: Apply the Vinyl Film: Now comes the fun part — vinyl film pasting. Peel off the backing paper and gently lay the vinyl onto the car surface. Start from the center and work outward to push out air bubbles using a squeegee. Apply gentle heat using a heat gun to make the vinyl more flexible and help it conform to curves and contours.
- Step 5: Trim Excess Vinyl: Once the vinyl is applied properly, use a precision cutter to trim off any extra edges around doors, windows, and corners. Apply light heat again to seal edges and ensure they stick firmly. Be careful not to overheat the material — too much heat can cause stretching or distortion.
- Step 6: Reassemble and Inspect: After all panels are wrapped, reattach any removed parts and inspect your vehicle carefully. Check for trapped air bubbles or loose edges. If you notice small bubbles, use a pin to release air gently and reapply heat to flatten the surface.
Also Read : Black Anodized Aluminum Basics: Understanding Black Anodizing Process
Can You Wrap a Car Yourself?
A professional finish may take practice, but with a quality DIY car wrap kit from a trusted company like Asian Coater, even beginners can achieve outstanding results. DIY wrapping is not just about saving money; it’s about personalization and satisfaction. You can experiment with colors, textures, and finishes without permanently altering your car’s paint. Plus, vinyl wrapping offers a protective layer, shielding your vehicle’s surface from UV rays, minor scratches, and environmental damage.
How to Wrap a Vehicle
Each car shape is different, so it’s essential to adapt your wrapping technique based on contours and edges. Start small — wrap mirrors, hoods, or roofs before attempting the entire car. Asian Coater recommends working indoors in a dust-free environment to ensure perfect adhesion.
Always remember to:
- Keep vinyl clean and dust-free during application.
- Avoid stretching too much while applying heat.
- Overlap edges slightly for a seamless finish.
- Use proper tools for trimming and sealing.
Following these practical steps helps you achieve a professional-level finish even without prior experience.
Advantages of a Vinyl Wrap
- Cost-Effective: A full car wrap costs much less than a paint job.
- Customizable: Choose from a variety of colors, patterns, and textures.
- Reversible: You can easily remove or change the wrap whenever you want a new look.
- Protective Layer: Protects the car’s original paint from scratches, UV rays, and oxidation.
- Professional Results at Home: With patience and a good-quality DIY car wrap kit, even beginners can achieve excellent results.
Asian Coater continues to provide premium-quality vinyl materials that make DIY vinyl wrap projects smooth, efficient, and long-lasting. Wrapping your car yourself is an exciting and rewarding project that not only enhances your vehicle’s appearance but also protects its original paint. Our durable films ensure easy vinyl film pasting, excellent adhesion, and stunning finishes that truly stand out. By choosing an Asian Coater, you invest in quality, creativity, and reliability helping you give your vehicle a new look with confidence and style.